
|
By: Jacoba Hopkins 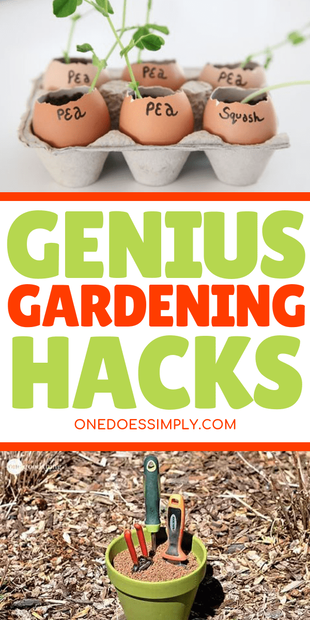 Gardening can be super fun! But it can also be pretty expensive. If you're like me then you're always looking for an inexpensive way to bring your garden to life. I'll let you in on a few gardening hacks that may help you out. These hacks are great because they include many things that you probably already have around your home. They're cost effective and will definitely be a conversation starter! 1. Use Eggshells as Seedling Pots via squakfox 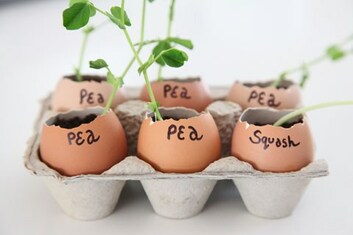 What gardener doesn't want cute healthy seedling plants in their home. Well, here is a simple and easy gardening hack that can be found in your fridge. Eggshells! Who would've thought? The eggshells are rich in calcium which helps promote plant growth. Here is all you need to do. Start by making a pinhole in the top of the egg. Use a knife to cut off the top 1/3 of the eggshell and drain the yoke. (You can also use cracked egg shells but make sure there is enough shell to create a container you can fill with some of our intelli-soil.) Throw in a little soil, plant the seeds, give them a little love and water, and walla! There you have a cute little seedling! (Here's helpful tip: Don't through away the carton just yet, use it as a base to store and transport the plants without dropping them! ) 2. Use a Citrus Peel via My Roman Apartment  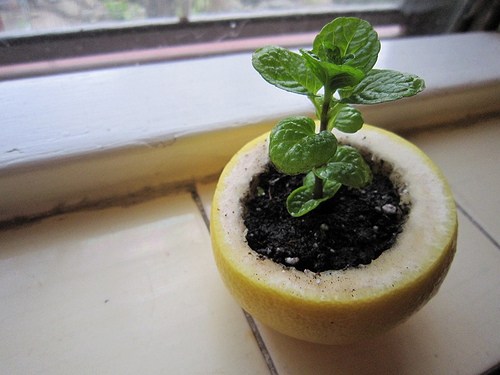 You may think I'm crazy now, but just bare with me. Spring is a great time because everything is coming back into bloom. This next hack uses a citrus peel as a pot. Citrus peels are full of nutrients and can be used as an easy and inexpensive decorative pot item. Just simply take half of your citrus peel and fill it with Intelli-soil! 3. Foam Peanuts to fill heavy pots via The Family Handy Man 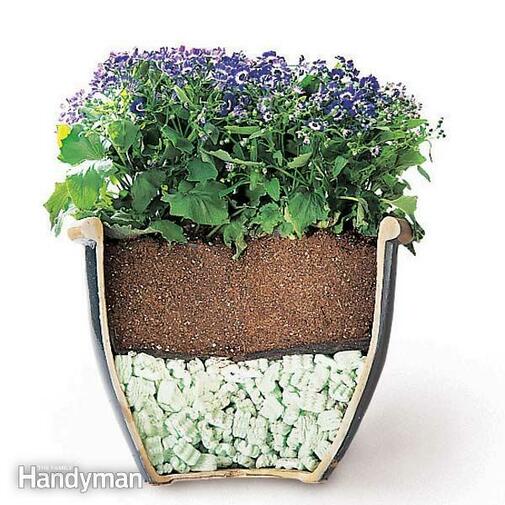 We all love big, heavy planting pots, but moving them is a whole different story. Usually I want to move them when my husband is at work and he can't help me. Here's a helpful hack just for that. Grab your pot and fill the bottom third of it with foam peanuts. The foam peanuts remove a lot of the weight and also increase drainage! Cover the foam peanuts with landscape fabric and fill the remaining space in the pot with intelligent-soil. This next step is super easy. Just grab your seeds and start planting away! Remember to check out these cute planter pots that Wild Valley Farms has to offer! 4. Coffee filters via popsugar 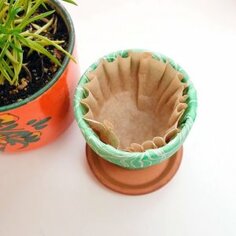 If you're like me and you're tired of the mess that your decorative planting pots leave behind, this hack is for you. Simply place a coffee filter in the bottom of your tiny planting pot before adding Intelli-soil. Your little coffee filter will help to prevent soil from seeping out the bottom of your pot while watering. Fill your pot with Intelli-soli and as your little plant grows, it will be thankful for that coffee filter.
7 Comments
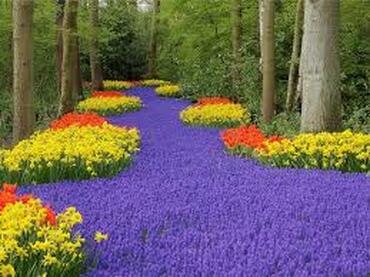 Spring, isn’t it an exciting time? Spring usually means warmer weather is just around the corner. This also means melting snow and the uncovering of your yards and gardens. Some of the many things that makes spring great is flowers blooming, fresh tilled dirt in garden beds, and a new breath of life for grass in the yard. This is the opportunity to bring color and life to your gardens and flower beds. There are many types of spring flowers. Here are some flowers you might consider when planning your garden this year; Pansy, bloodroot, snowdrop anemone, lilac, daffodil and my favorite tulips. When I think of tulips, I picture myself walking through fields full of them in the countryside of Holland. However, tulips originated from the Ottoman Empire, also known as present day Turkey. Tulips were actually imported into Holland in the sixteenth century by a man named Carolus Clusius. He wrote one of the first major books about tulips in 1952 which helped make these flowers so popular. They became so popular that his garden was raided and had bulbs stolen from it on a regular basis! Did you know that tulips are one of the best flowers to plant in the spring? They can be used in a variety of settings, formal naturalistic, or causal. Either way there is a tulip for everyone, from a diminutive four inch tall to a beautiful multi-foot-high blossom.  Here are some helpful tips on how to get your garden ready for the spring! 1. Inspect Raised Garden Beds We all know that winter can be harsh on our plants. From the freezing cold temperatures to the heavy snow fall we seem to get a lot of! Before you do anything, check for damage. It can become really easy to be ready to jumpstart your garden and then realize that you have bowed or split wood on the frames. 2. Check your Garden Tools Did you consider to look at your tools? There's a 50/50 chance you have everything you need. This may save you time in the long run when trying to prepare your garden for this year! A good wipe down of all your tools is always a good idea and will help them preform to their high function! Here's a helpful hint, if the wooden handles are starting to split or have cracks, you can wipe them down with boiled linseed oil! Which increases its resistance to warping and cracking. Cool right? 3. Turn Compost Now that we have the basics done, time to move into actually getting you garden ready! Now its time to get the soil ready. Here at Wild valley farms we have three different kinds of soils to choose from! There's our Intelli-soil which is a special formulated growing mix that is ready to use in your house plants, hanging baskets and outside pots! The second product is SoftSoil, SoftSoil is a special blend of premium topsoil and our Terra Zest, it's perfect for raised bed gardens. It's a two for one type of deal! Lastly we have good old Top Soil. Which has been screened to create a premium consistent product that has no rocks or other debris. Soft Soil
$55.00
A perfect blend of our screened topsoil and our premium compost. This is a great product for raised bed gardens! Price is per cubic yard (about a pickup load) and will cover about 162sqft 2 inches deep. Delivery is ONLY available in Utah and Western Wyoming. Add in the comments when your preferred delivery time would be and we will call to finalize. 4. Top Dress Garden Beds Now that we've got the garden beds looking great, clean tools and your favorite compost/soil. Now its time to prep for putting those beautiful flowers in them! It's time to add the manure. There are two different types that Wild Valley Farms offers; Steer and Horse. Here's the breakdown of the two. Steer manure is used for a variety of lawn and garden needs. It helps improve the soil quality and health. Horse manure is well aged and broken down to provide a great natural fertilizer, it contains sawdust bedding to help loosen clay soils. We recommend top dressing with our Terra Zest which is a high quality compost. 5. Divide Perennials We are finally on to the fun part, adding the flowers! Go to your local store and pick up some of your favorite seedlings. Or if your neighbor has some flowers/seeds that you like, ask them to see if you could use them or maybe trade some of what you bought for what they have! It's a very cost efficient way to add and give! Remember no to use any plant if they show signs of disease or discoloration. You wouldn't want to bring it to your new garden!  6. Weed and Mulch! Lets get rid of those pesky weeds! Nothing ruins your day and garden like weeds! Remove young, sprouting weeds first and then add a layer of cardboard or landscape fabric onto the bare ground. Next, add about three to four inches of mulch. That is a sufficient amount to discourage any new weeds. Finally, plant your gardens tightly with your favorite perennials, annuals, trees and shrubs to try and crowd out the weeds. Want to add a little bit of color to your garden? We offer five different colors of mulch to help add that little extra you might be wanting! Colored Mulches
$45.00
Our premium-colored mulch is made from kiln dried wood which is why it holds it's color for 2 years before fading. Price is per cubic yard(a yard is about a pickup load), and will cover about 162 sqft 2 inches deep. Choose which Color you want by checking the small color box, then you can choose your Quantity. Delivery is ONLY available in Utah and Western Wyoming. Delivery prices may vary from the standard $100 fee based off of county. Add in the comments when your preferred delivery time would be and we will call to finalize. 7. Prune
Now that you've done all the work, it's time to keep it all under control. Remove any dead branches from the shrubs, pull any weeds that might pop up. Also thin and shape the hedges, they need to look nice as well! Hopefully these tips will help you feel a little less overwhelmed with getting your lawn and garden ready for the coming warm months! |
Archives
May 2024
Categories
All
|
 RSS Feed
